If you're an alumni, we taught you a LOT on your course! Check out our Alumni Lessons to help refresh your memory of basic camp craft and teachings from your instructors.
HOW TO PACK AND FIT A BACKPACK
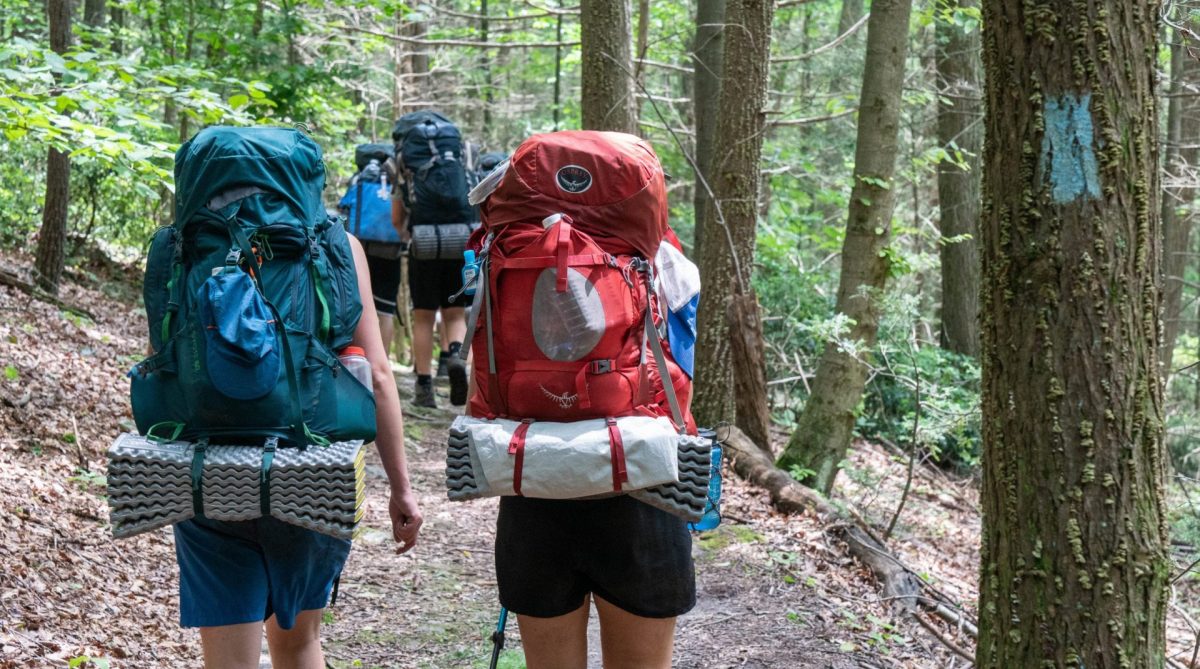
For those of you who want to go backpacking again in the future, check out these Outward Bound tips and illustrations to properly pack and fit your backpack!
PACKING YOUR BACKPACK
1: LOOSEN STRAPS
If your pack has straps on its sides, loosen them to make sure you have all the space you need to pack your backpack.
2: LINE YOUR PACK
Keep your gear dry from rain or spills by lining your pack with a waterproof bag, either an official pack liner or something as simple as a garbage bag.
3: SLEEPING BAG
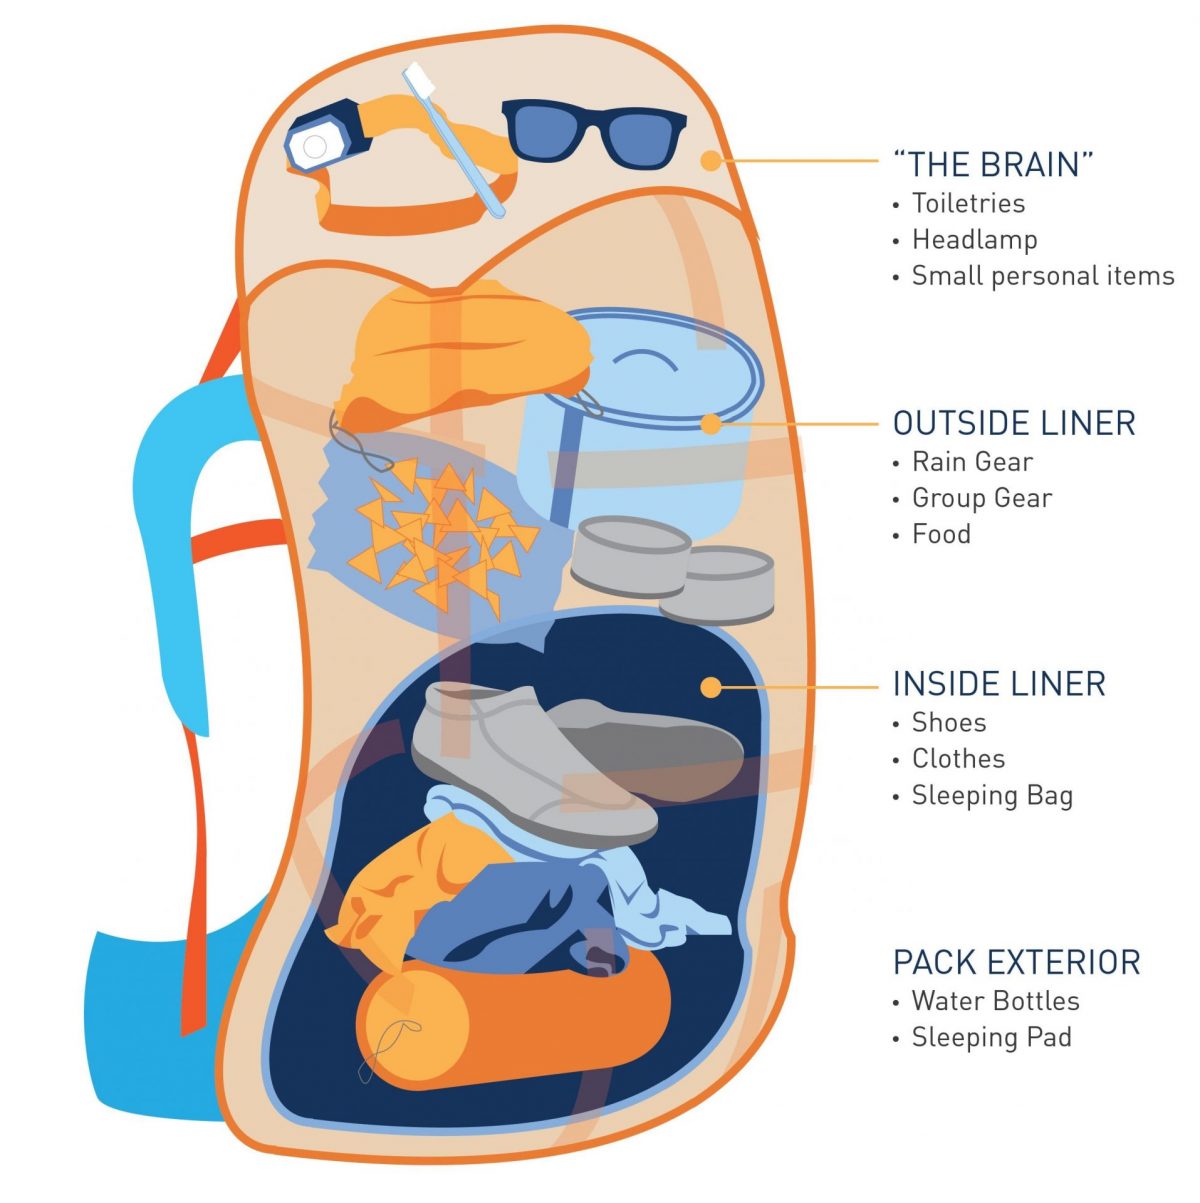
Your sleeping bag goes in the bottom of your pack. It's the item you'll need least on the trail, so tuck it away for safekeeping!

4: CLOTHES
Your clothes will go on top of your sleeping bag. The best part is, you don't have to fold them! Roll them up or stuff them into nooks and crannies as needed.
5: SHOES
Put your camp shoes like flip-flops or sneakers on top of your clothing. If you're worried about dirt getting over your clothes, pack them in their own small plastic grocery bag.
6: TIE YOUR LINER
Everything else packed from here on out doesn't need to go in your liner, so tie it up tight to keep it waterproof.
7: FOOD
Store your food next on top of your liner. It's easiest to pack food when it's out of its original packaging - no need for bulky cardboard boxes if what's inside is already in plastic!
8: GROUP GEAR
Your group gear comes next and should be packed on top of your food. Group gear items you might have include a tarp, pot, stove, or other kitchen supplies.
9: RIVER-ROLLED RAIN GEAR
Roll up your rain gear nice and tight to go on top of your group gear. You want this at the top of your pack so if it starts raining you can grab it in a jiff.
10: TOILETRIES & HEADLAMP
Close the main compartment and open up what we like to call "the brain" of your pack, the top piece of the pack that clips over the main compartment. For easy access store your toiletries, headlamp, gloves, hat or other small pieces of gear that might be quickly needed on the trail.
11: SLEEPING PAD & WATER BOTTLES
Last but not least, roll your sleeping pad and clip it on the outside of your bag with the straps on the bottom, and stuff those awesome 32 oz water bottles you've got into the pack's side pockets.
FITTING YOUR BACKPACK
1: LOOSEN STRAPS
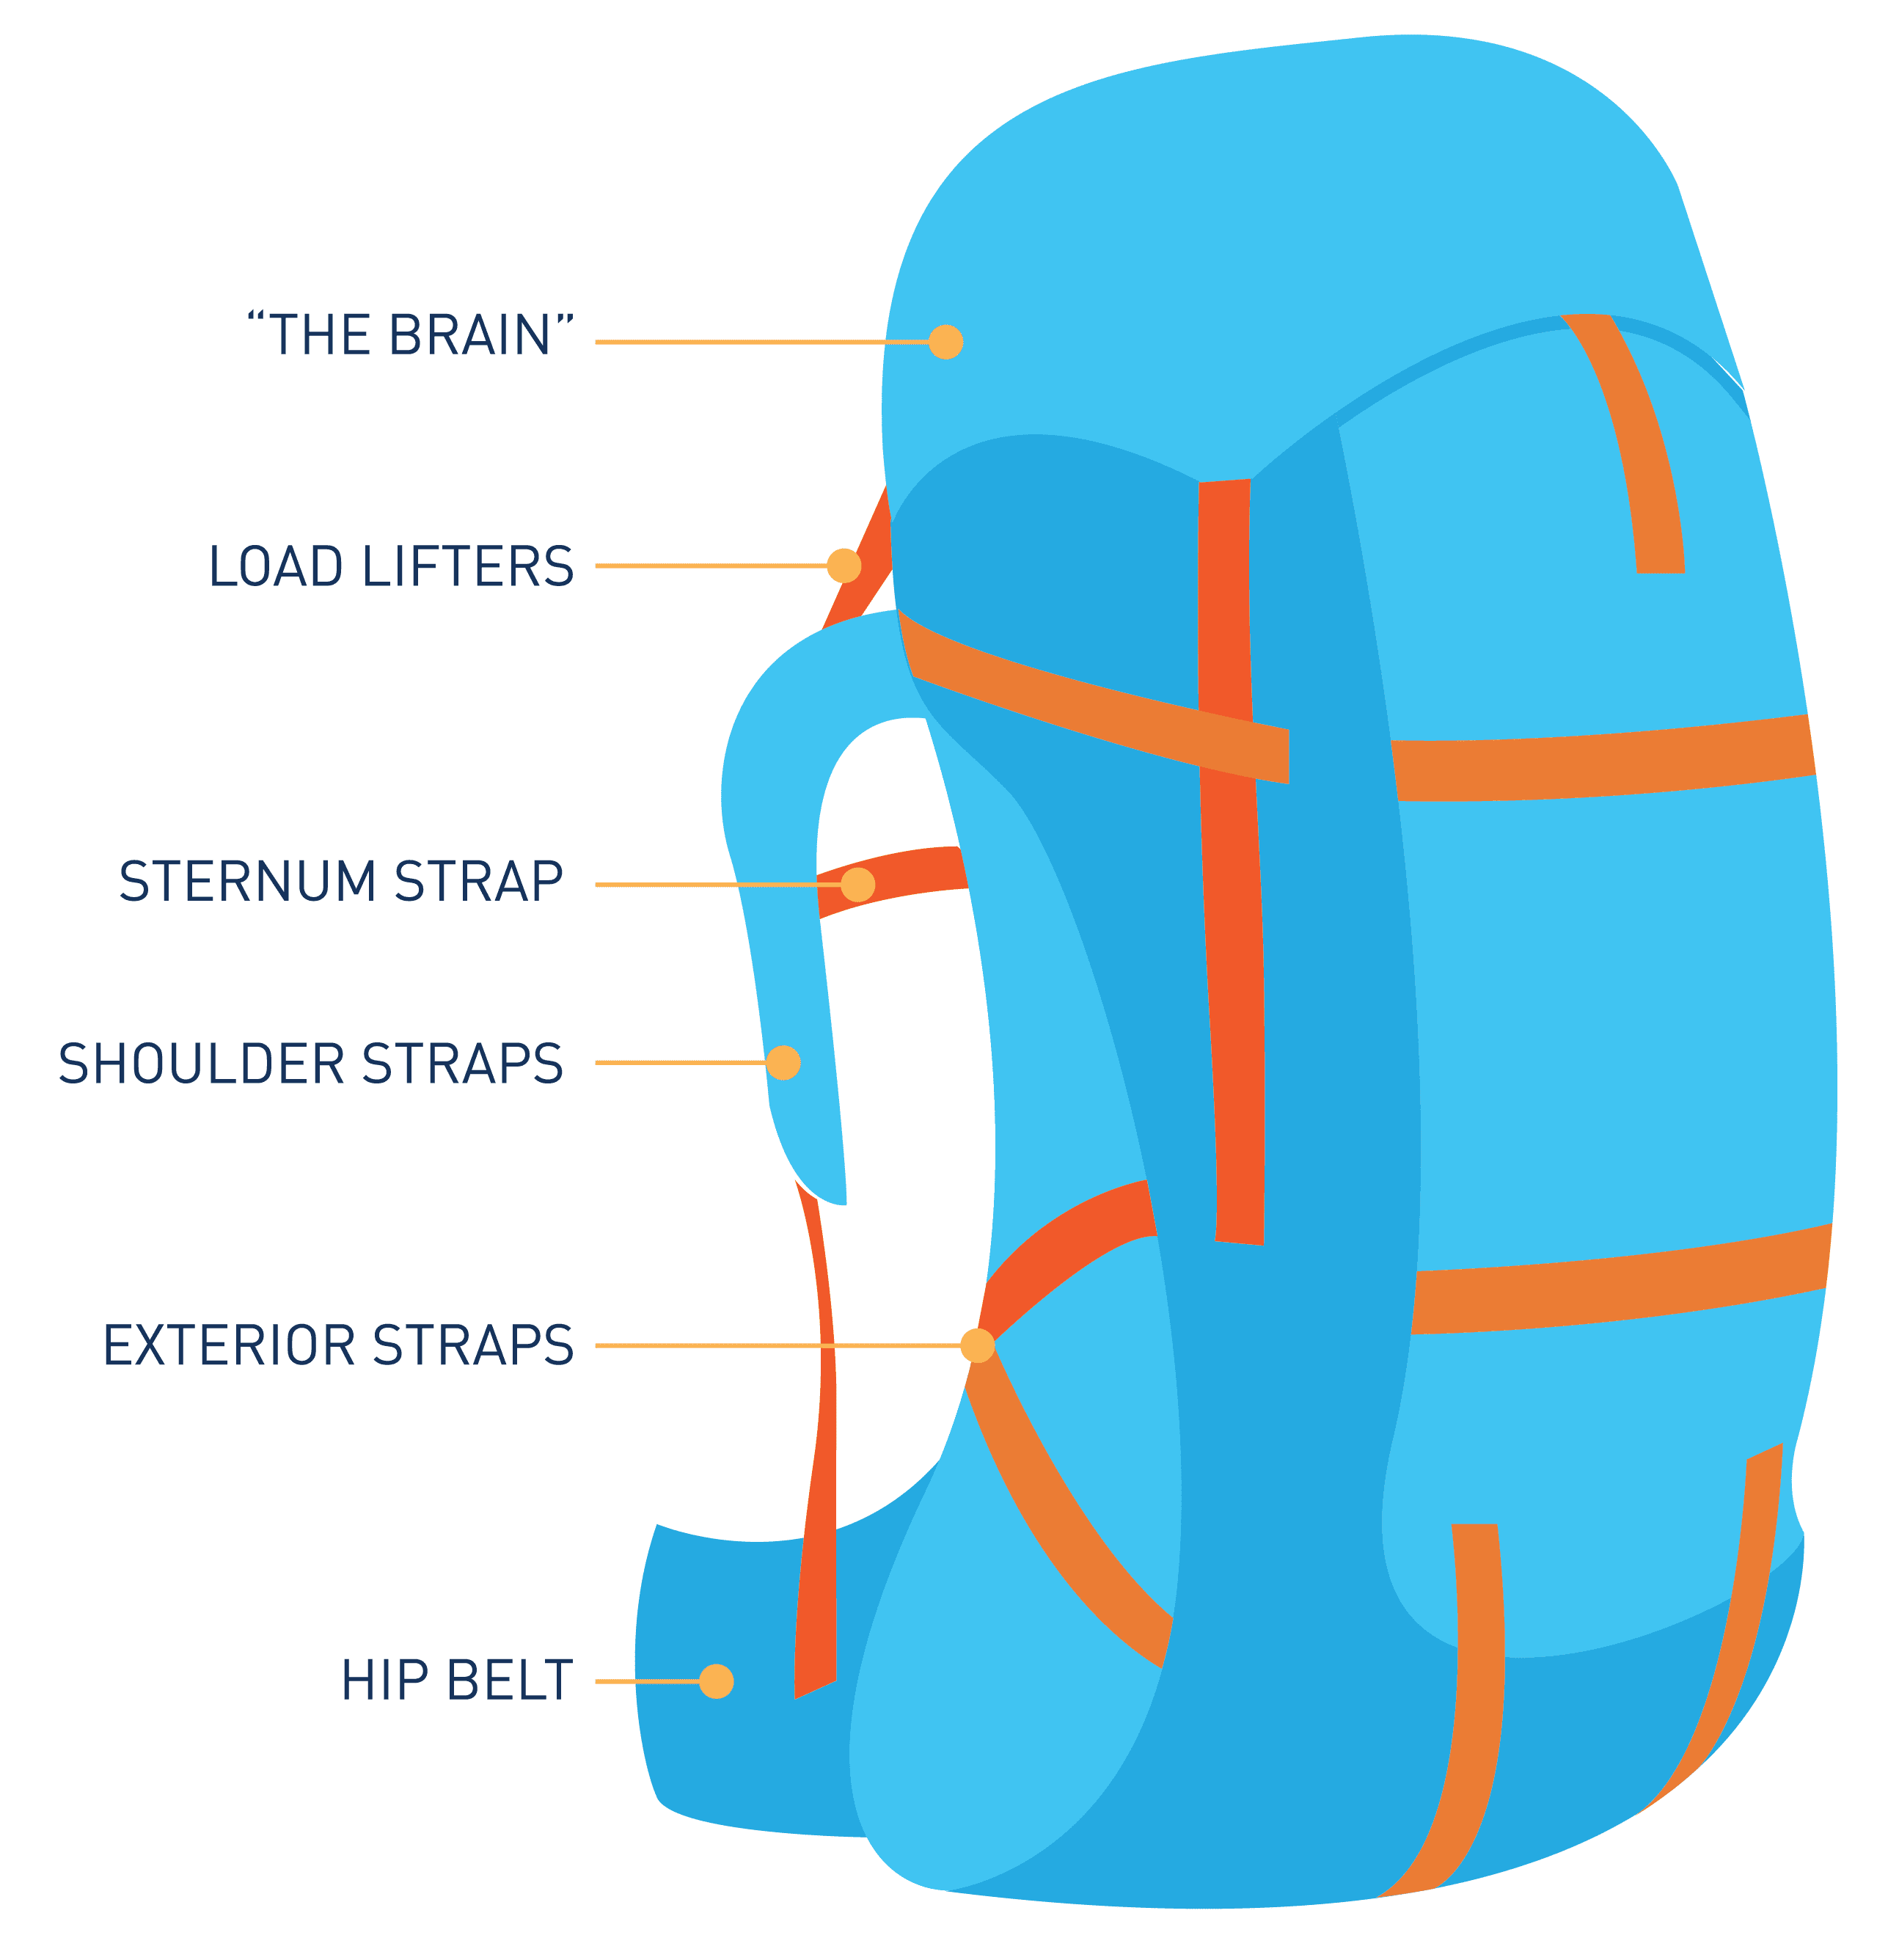
Loosen all of the straps on your backpack - this includes the hip belt, shoulder straps, sternum strap, and load lifters (the straps above the shoulder straps).
2: HIP BELT
Put your shoulder straps on (don't tighten them yet!) just to wear the pack for now. Jump up if you need to and make sure your hip belt is above your hips, around your natural waist. Clip and tighten your hip belt so it's snug enough to stay in place without holding on to the pack.

3: SHOULDER STRAPS
Tighten your shoulder straps by pulling down on the ends. Make sure they're snug, but not so tight that they'll restrict your movement or be uncomfortable to wear for long periods of time.
4: LOAD LIFTERS
Reach up for the straps above your shoulders on either side of your pack and tighten them. These straps help keep the weight of your backpack forward, so you don't end up falling backward on the trail!
5: STERNUM STRAP
This strap is optional! The sternum strap goes across your chest and will be hanging loosely from your shoulder straps. Clip it on and tighten it for extra security.